Result. The Raccoon Soaker has started: an ESP32-CAM that watches the steps onto my deck and, when something moves, opens a 12 V water valve for two seconds. None of it has touched water yet. But on my Mac, a fake 8-bit raccoon walks past a fake camera every 20 seconds and gets soaked every time, and the test stand to build it on is modelled and ready to print.
The parts
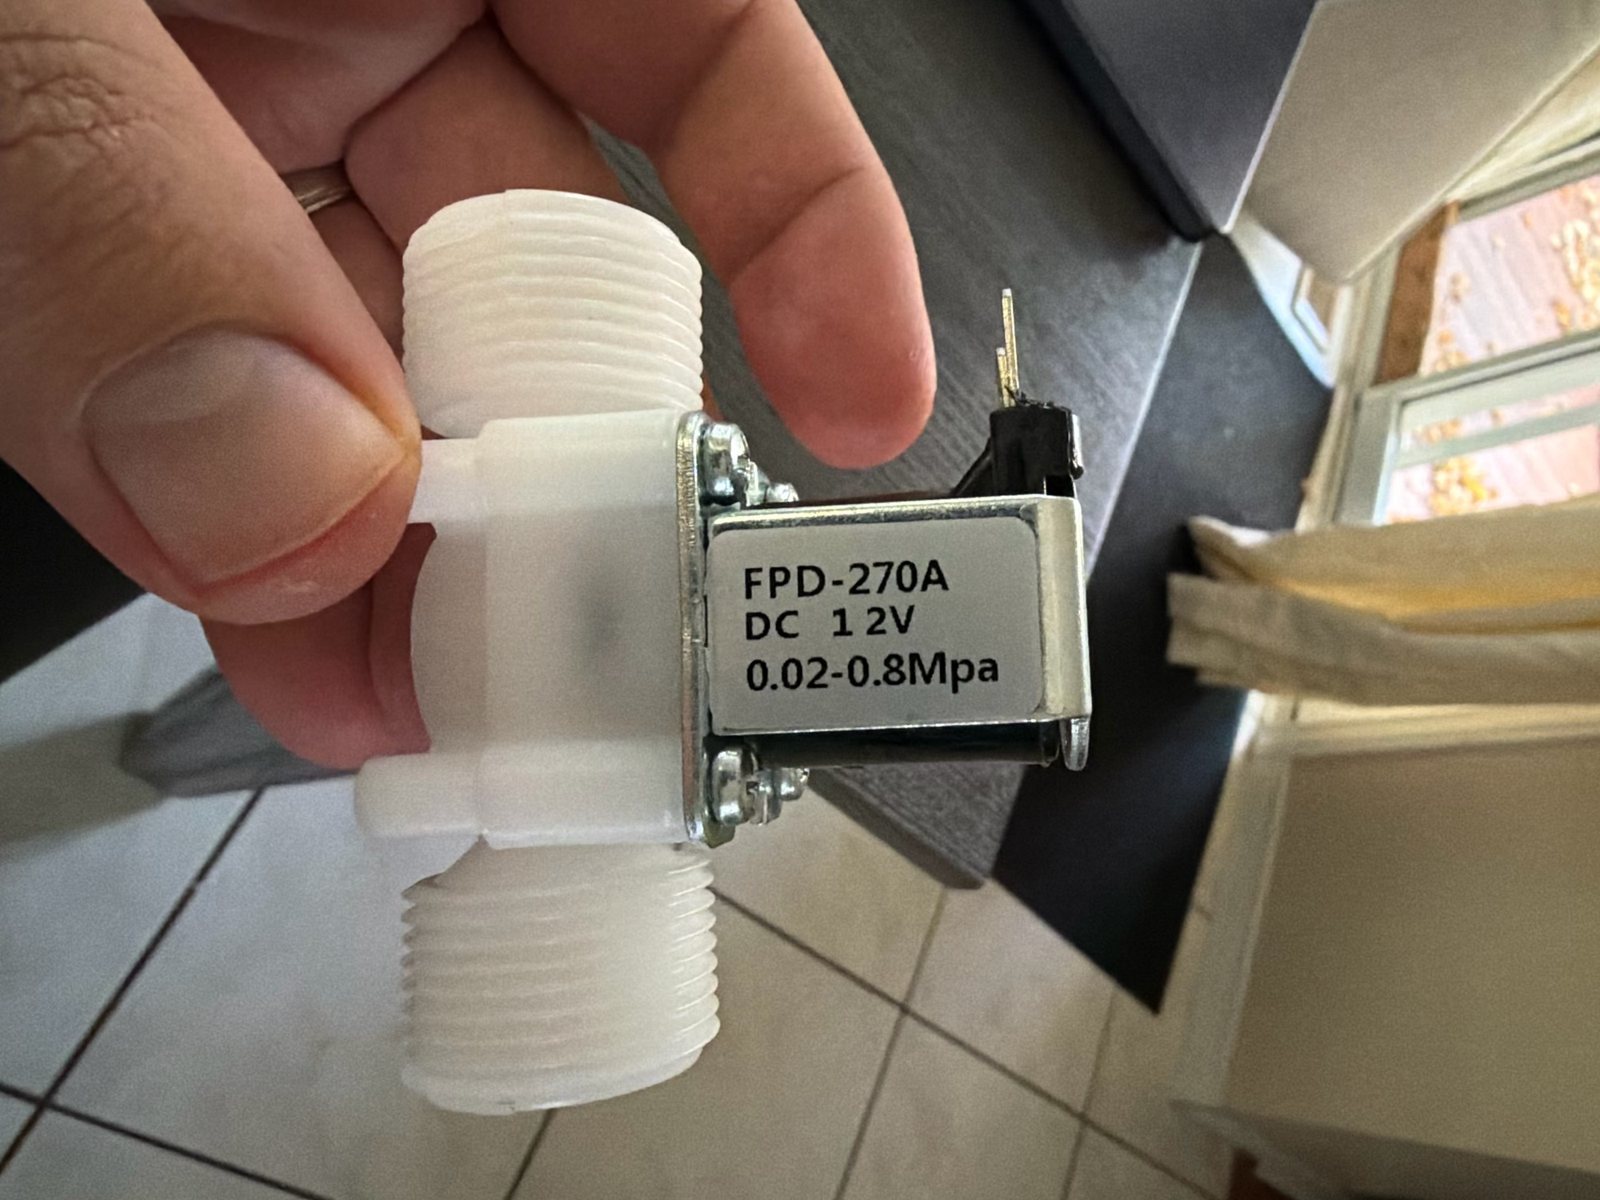
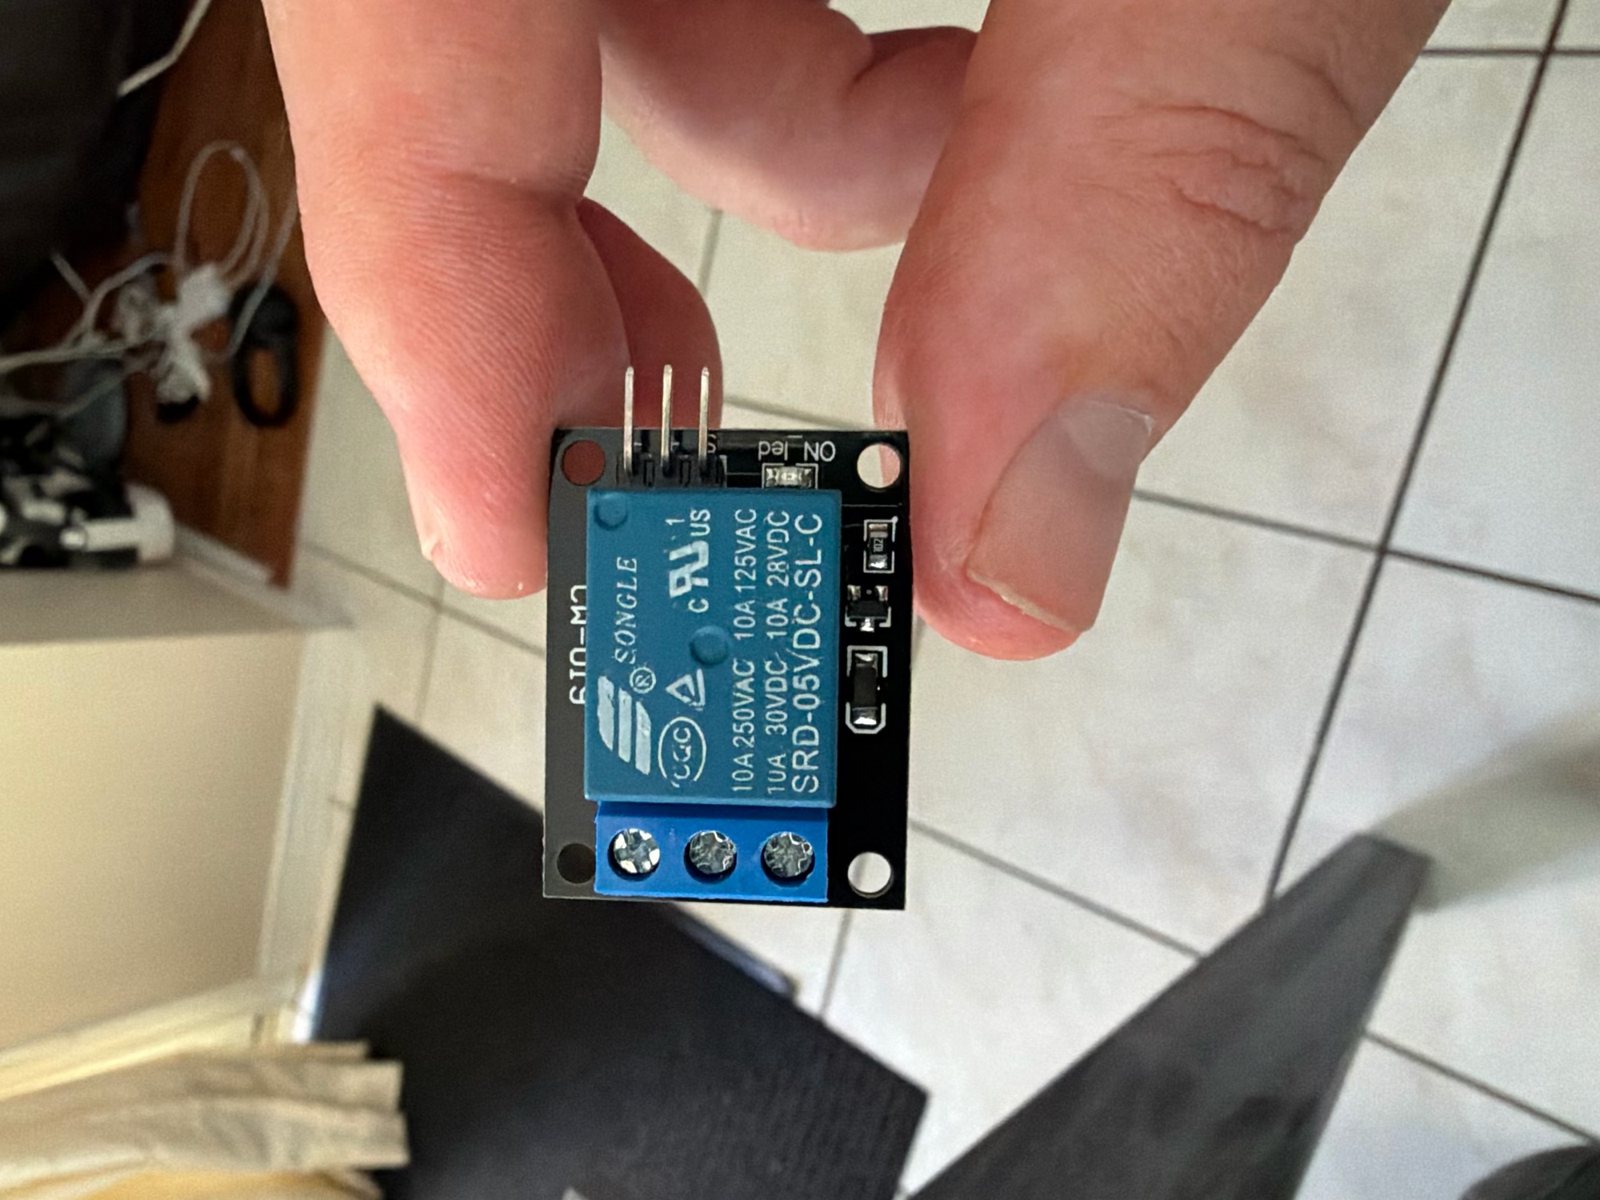
Three new things arrived: a 12 V adapter, a solenoid water valve and a 5 V relay module. The fourth, an ESP32-CAM, has been sitting in my parts bin.
 |
 |
|---|---|
| The valve: 12 V, normally shut | The relay: a 5 V coil switching up to 10 A |
Two things on those labels mattered before writing any code:
- The valve needs water pressure to open. "0.02–0.8 MPa" means at least about 3 psi. It's a pilot valve: the water itself helps push it open. A garden hose is fine. A bucket on a shelf isn't.
- The relay keeps the two circuits apart. The ESP32 only drives the relay's coil, through the module's own transistor (about 2 mA from the pin). The relay's contacts are a separate circuit, so the 12 V never touches the 3.3 V side. On the schematic, the 12 V return gets its own label, "GND 12V", because it isn't the logic ground.
A 1N4007 diode goes across the valve. A coil fights being switched off and throws a voltage spike when it is. The diode gives that energy somewhere to go instead of arcing across the relay's contacts.
On the canvas first
Bench had none of these parts, so I added them: the ESP32-CAM, the relay, the valve, the diode and a barrel-jack terminal for the 12 V adapter. Each has an electrical model. Drive GPIO 13 high and the simulation shows the relay drawing 70 mA, the valve getting 11.9 V and about 0.43 A, and the diode blocking, as it should until the coil switches off. (The 0.43 A comes from a typical coil. I still need to measure mine.)
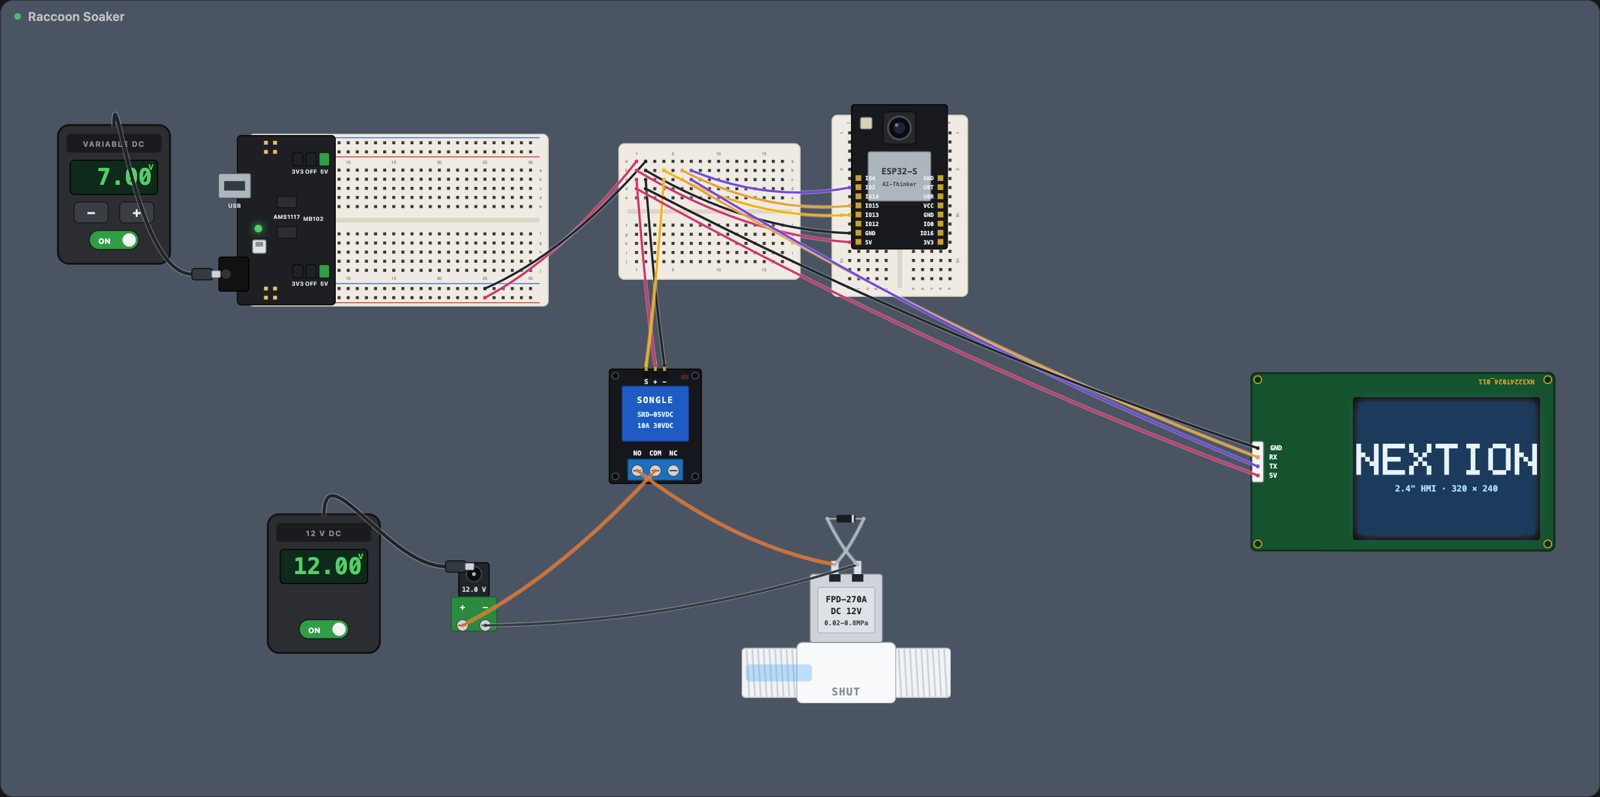
Laying it out caught three problems before they cost anything:
- GPIO 12 was a bad choice for the relay. My first attempt at this, back in May, used it. It's a boot pin: hold it high at power-up and the ESP32 won't start. It's also one of the SD card's pins. The relay moved to GPIO 13.
- The power module would cook. Without a 12 → 5 V buck converter, the obvious move is to feed 12 V into my breadboard power module. Its regulator would turn about 7 V × 0.3 A into heat: about 2 W, in a box, outside. On the bench, the camera runs from the rig's 5 V. Outdoors it gets a buck converter.
- The USB board covers every pin. The ESP32-CAM has no USB of its own. You flash it on a little adapter board that it plugs into, and that board covers all 16 pins. So: flash it once over USB, then update it over Wi-Fi from then on.
Teaching a camera to spot a raccoon
The detection is simple on purpose. The camera takes 320 × 240 black-and-white frames. The sketch cuts each one into 768 blocks of 10 × 10 pixels and compares each block's brightness with a background it learns slowly. A block counts as "changed" if it's more than 18 brightness levels off. If 2% of the blocks change for three frames in a row, that's an animal: spray.
Two rules keep it from spraying the wrong things:
- If 40% of the picture changes at once, it's the light, not an animal: a cloud, the porch light. It re-learns the background instead.
- It waits after spraying. The splash itself looks like movement, so it ignores the picture for 3 seconds, then cools down for 20.
There are hard limits too: the valve can never stay open more than 10 seconds, and it stops after 12 automatic sprays in an hour. Something waving in the wind shouldn't empty the hose overnight.
A raccoon that only exists on my Mac
Bench runs sketches on the Mac ("Preview") against the canvas. But a Mac has no ESP32 camera, so Preview makes one up: a grey back yard with a little sensor noise. Then a dark blob walked across it. I couldn't see it, and a blob isn't much of a raccoon. So now it's an 8-bit raccoon, mask and ringed tail included, walking past every 20 seconds, with a countdown on the camera picture.
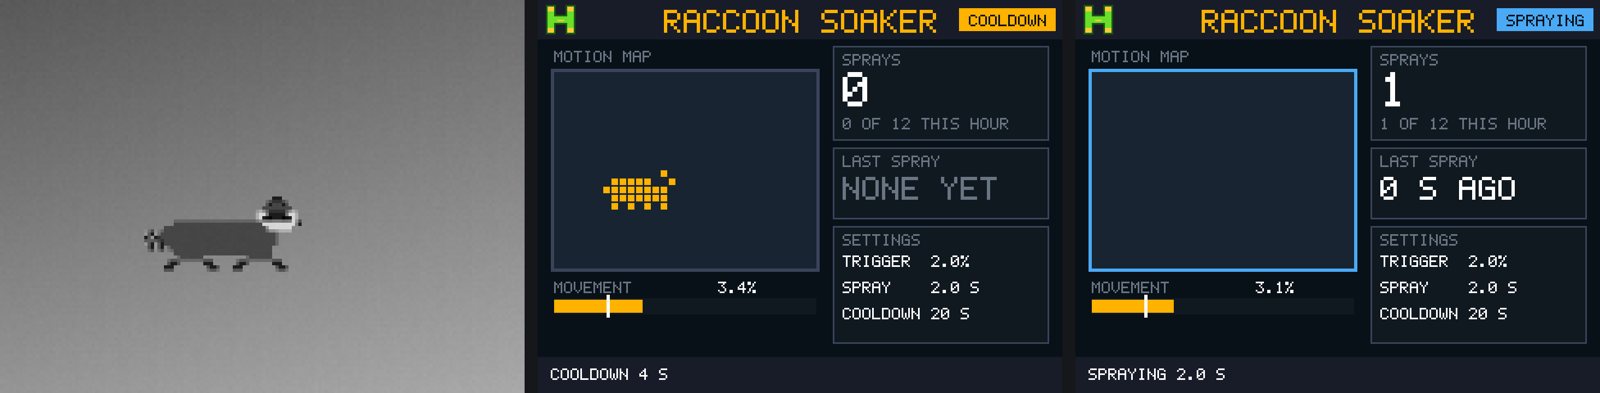
The sketch caught it on every pass, at 3.0 to 3.9% of the picture against the 2% trigger, and the sensor noise alone never set it off. Two catches turned up:
- My first raccoon came at 10 seconds and was ignored. The sketch has a 20-second grace after power-up, so you can plug it in and walk away. The raccoon now arrives at 20.
- In Preview there was no way to type
@sprayto the sketch. Now there's a command box, and Spray / Arm / Disarm buttons on the camera.
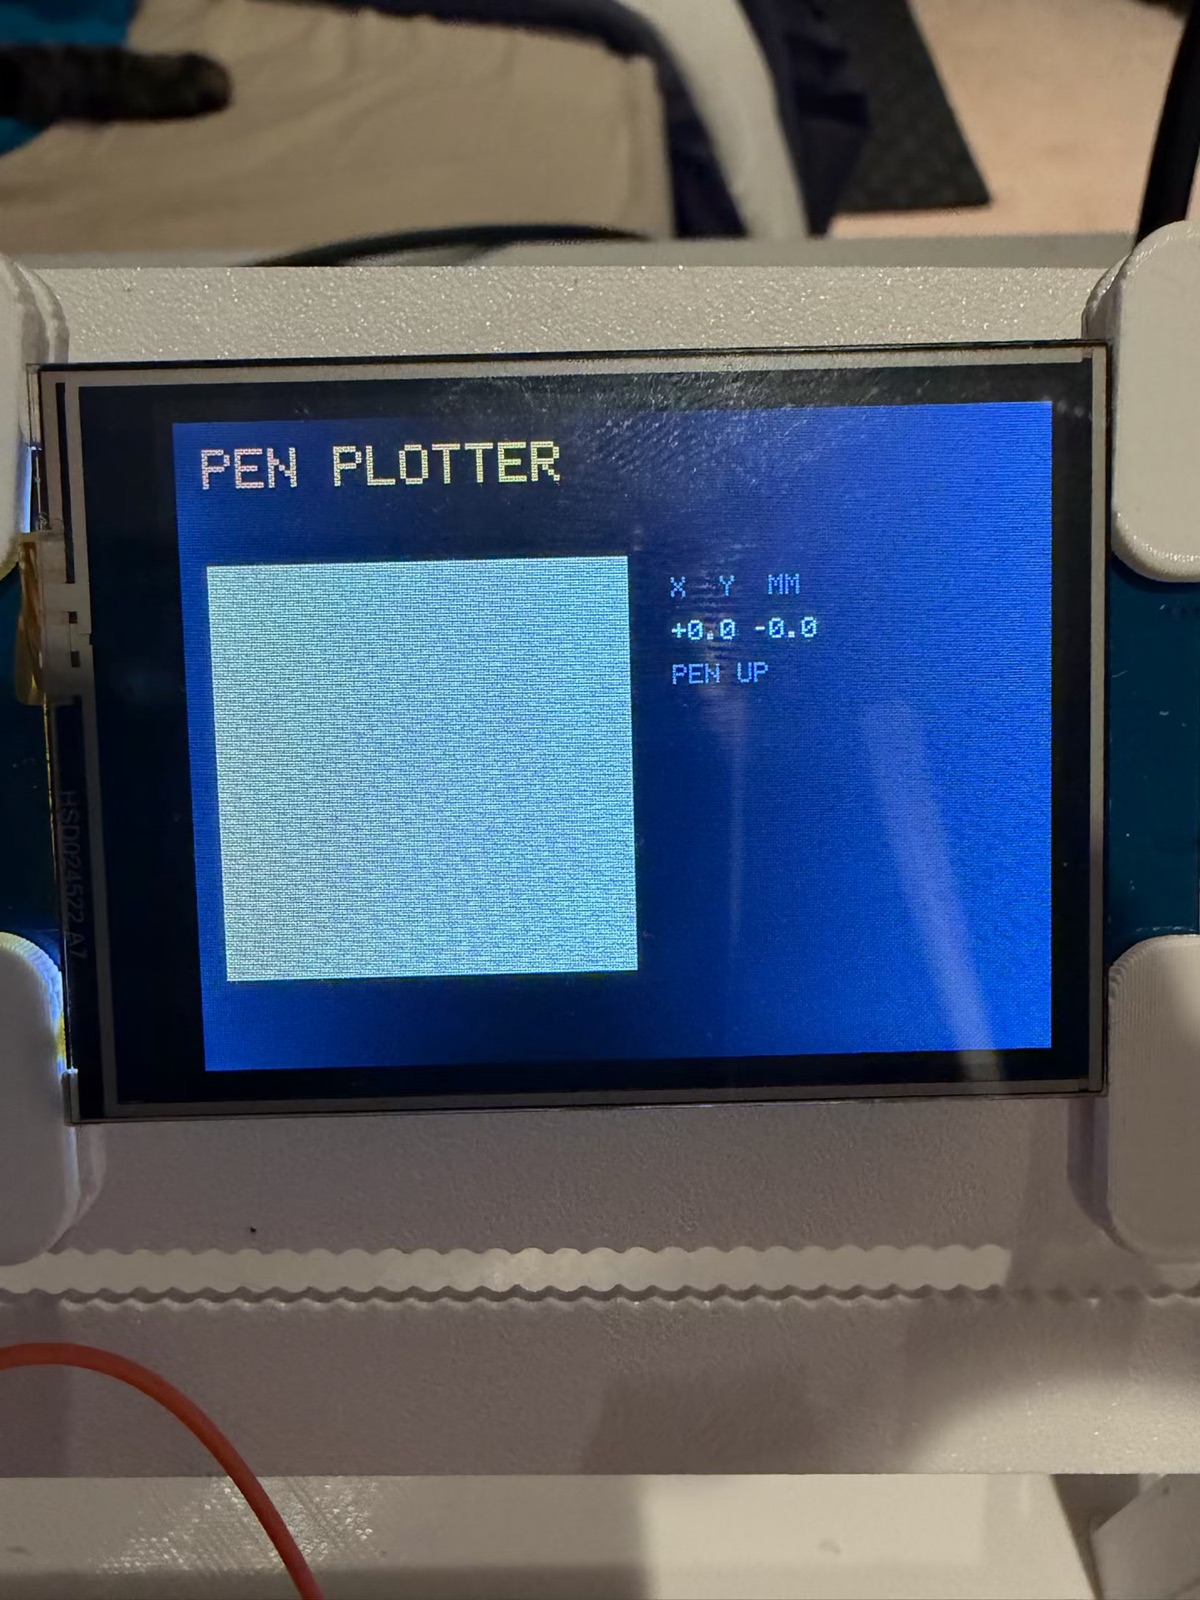
The display (in the middle and on the right) is laid out like the Pen Plotter's. Its motion map shows the 768 blocks, lit amber where the sketch thinks something moved, so I can watch what the camera "sees" while tuning it.
A stand to build it on
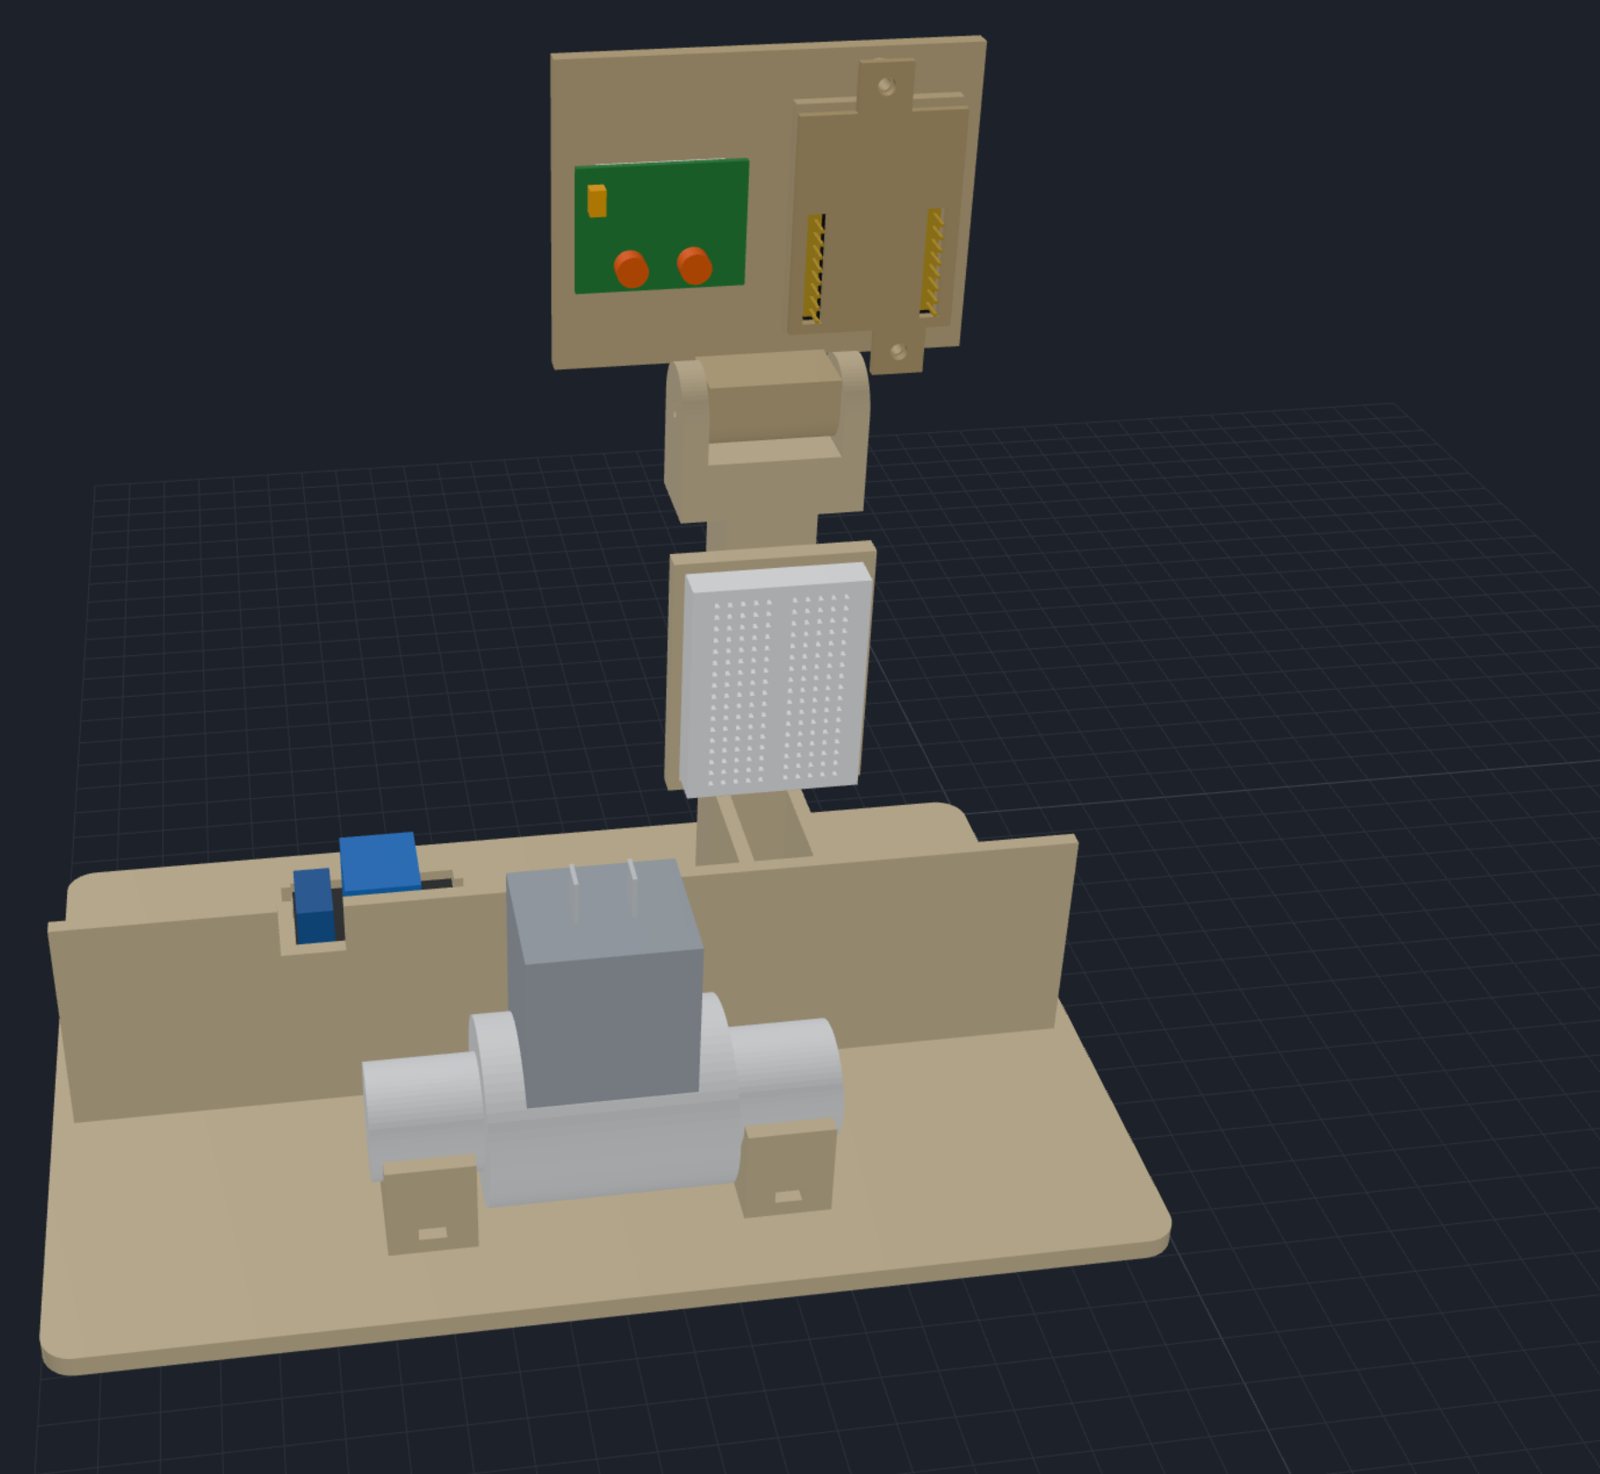
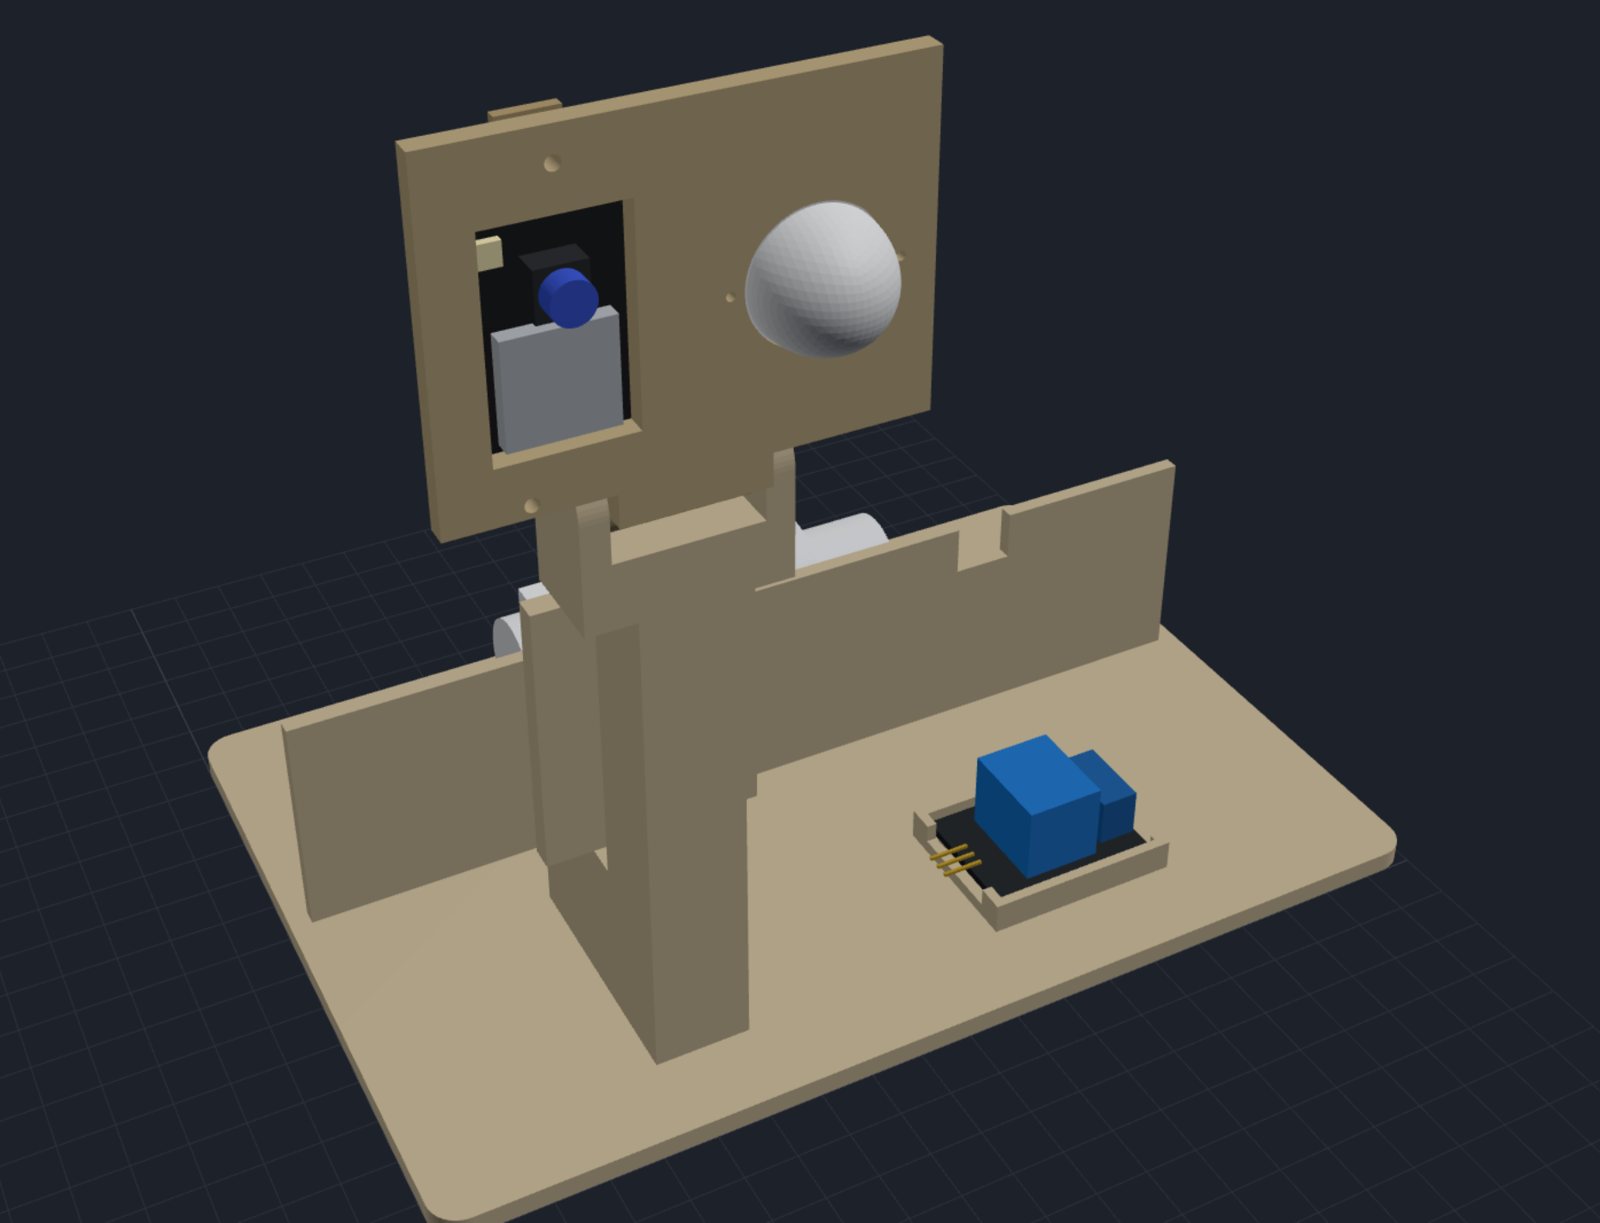
The test stand sits next to my studio rig. The camera and a PIR sensor share a head that tilts on the post. A small breadboard on the back of the post is the hub. The relay has a pocket, and a splash wall keeps the valve away from the electronics.
The camera was first held by a rubber band. The obvious fix was snap clips. But the board lies flat against the plate, so a clip arm could only be about 3 mm long, far too stiff to bend. It got a screwed-on back cover instead, with slots so the pins still poke out for jumpers.
What's next
It can't see in the dark, and raccoons come at night. A normal camera needs light, so an HC-SR501 PIR (it senses body heat) is on order. Then: flash the real board, hear the valve click, measure the coil, and design the real thing for the deck rail, guarding the steps, with a printed nozzle.
What I learned
- Read the labels before the code. The valve's minimum pressure and the relay's separate contacts decided the design before any software did.
- A relay is a wall, not just a switch. The 12 V side and the 3.3 V side never share a wire.
- Check the boot pins. On an ESP32, a pin held the wrong way at power-up stops the board starting. GPIO 12 is one of them.
- Fake data you can see beats fake data you can't. Detection "worked" with an invisible blob. I only trusted it once I could watch the raccoon cross the picture and light up the map.
Comments (0)