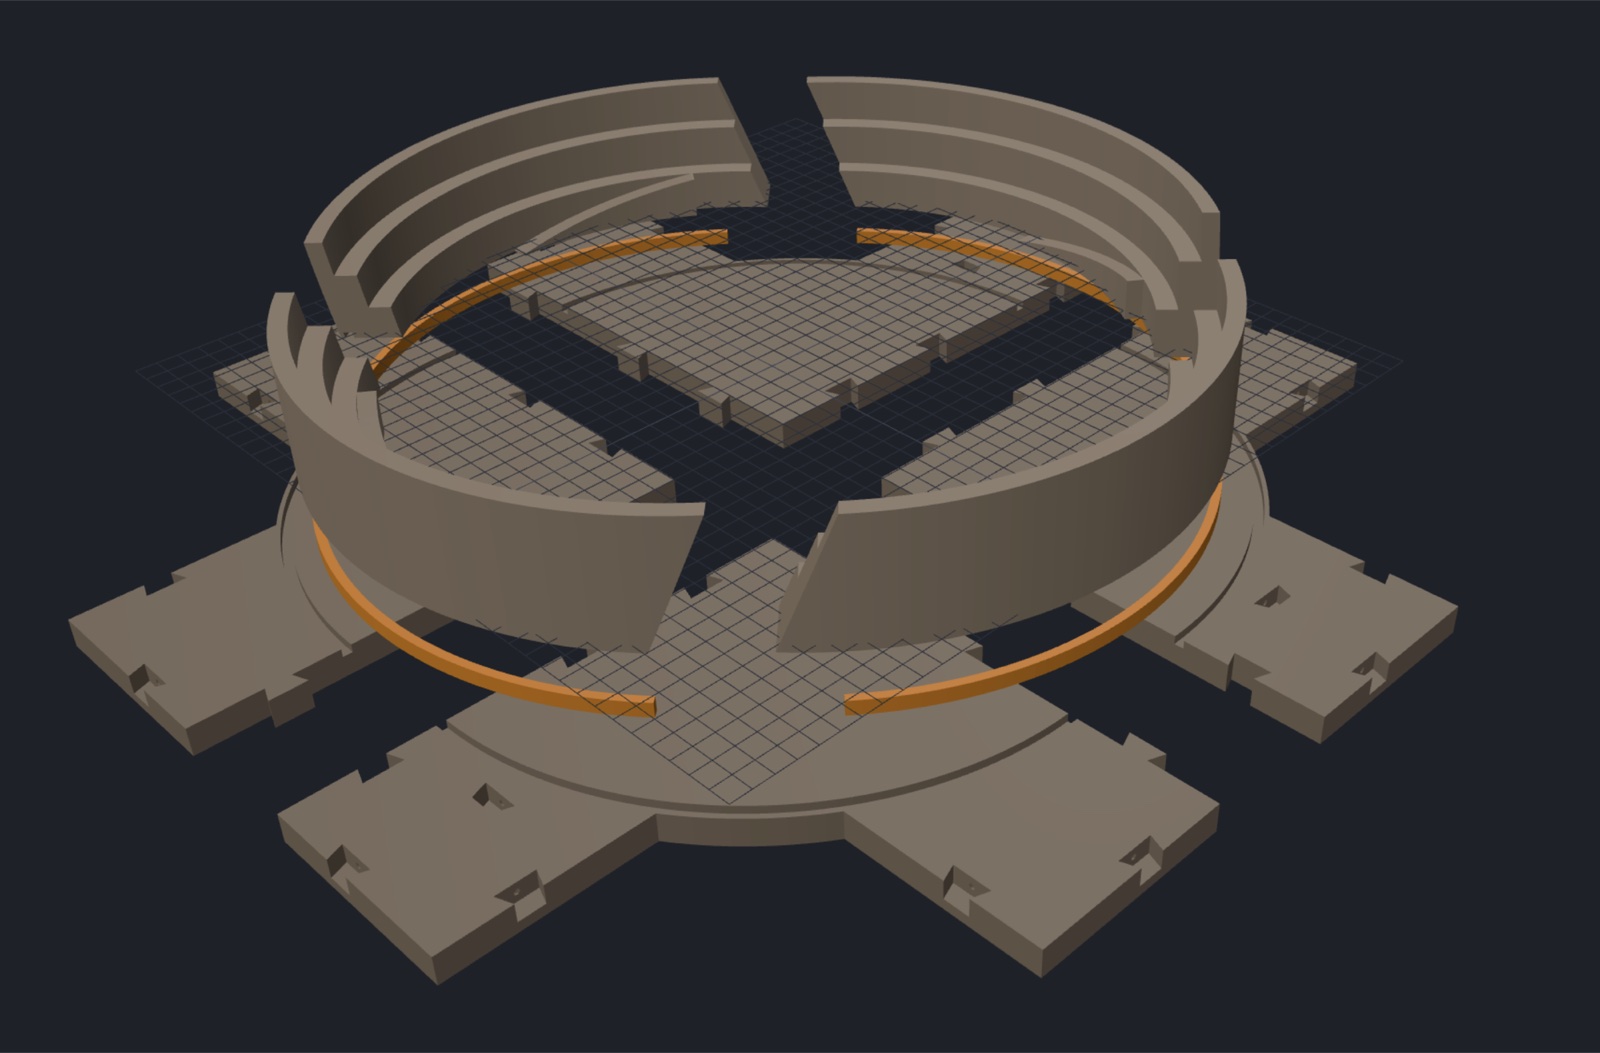
The game board is two prints, each made four times: four identical flat tiles and four identical crater-wall segments. They lock together with no screws and only one spot of glue per segment, and come apart into a stack for the shelf. Every module (the excavator platforms, the hoppers, the control consoles) drops into the same dovetail socket and lifts straight out. Nothing is printed yet except a small seam test piece to check the fits.
Why the board got its own design
After part 1, I kept adding pieces to the corner pods: an operator console clamped to the table edge, the power bank on a shelf, a hopper on a stand. Each one solved a problem, but together they looked like three unrelated objects joined by a cable.
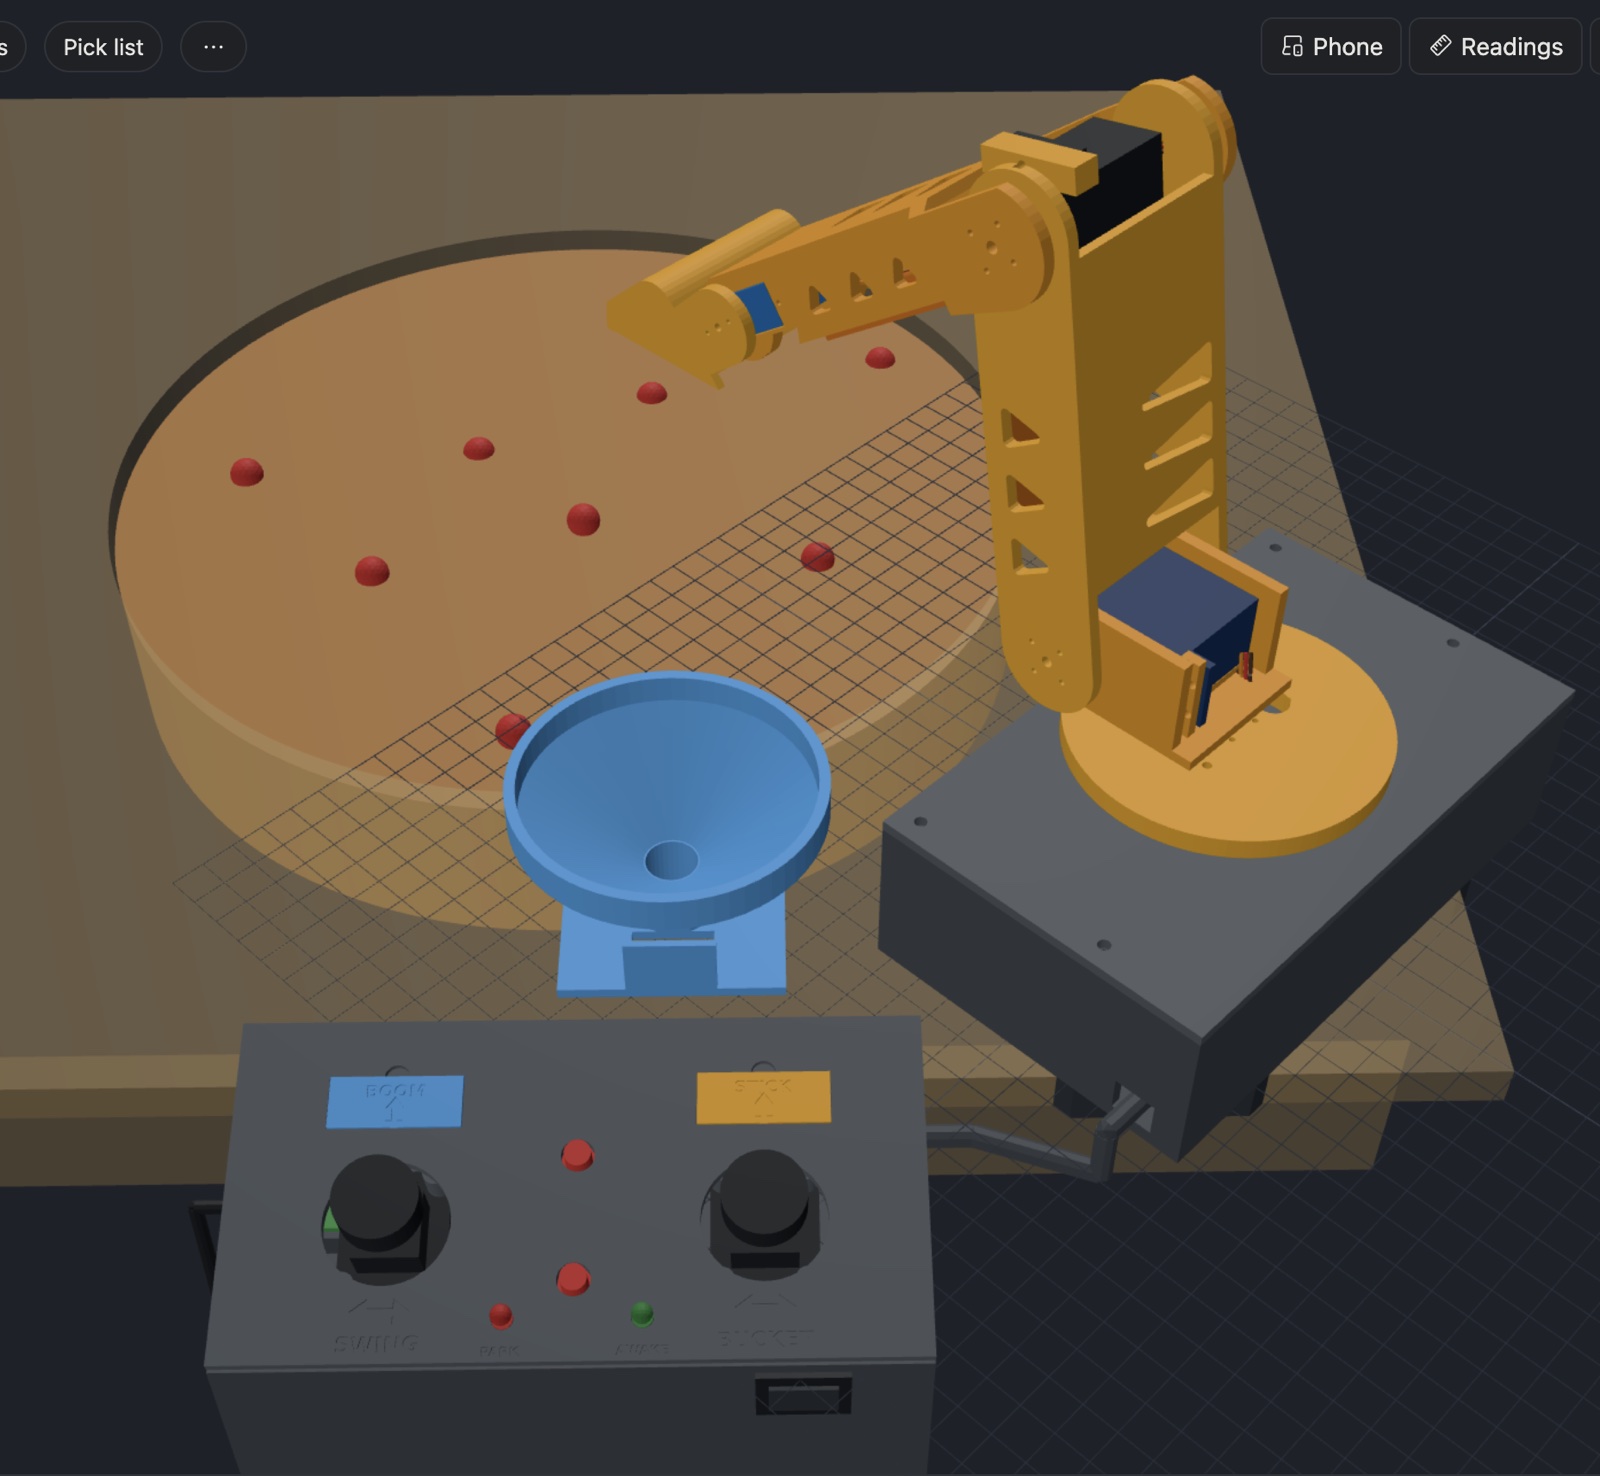
So I stopped fixing collisions and went back to design. Claude asked me one question at a time, and each answer settled one decision:
| Question | My answer |
|---|---|
| How is the board made? | Printed, in four tiles (the P1S bed is 256 mm) |
| Sunk pit or raised wall? | A raised crater rim on a thin deck |
| Where do the pods stand? | On platforms at rim height, so the arm keeps its 60 mm dig depth |
| What does the hopper look like? | Machinery: a braced bin feeding a conveyor (gravity for now) into a counting box |
| Where's the console? | Centred on my edge of the table, in front of me |
| What does the crater look like? | An open-pit mine: terraced benches and a haul ramp |
| Team colours? | One mining company: orange and grey machinery, crew colours on small parts |
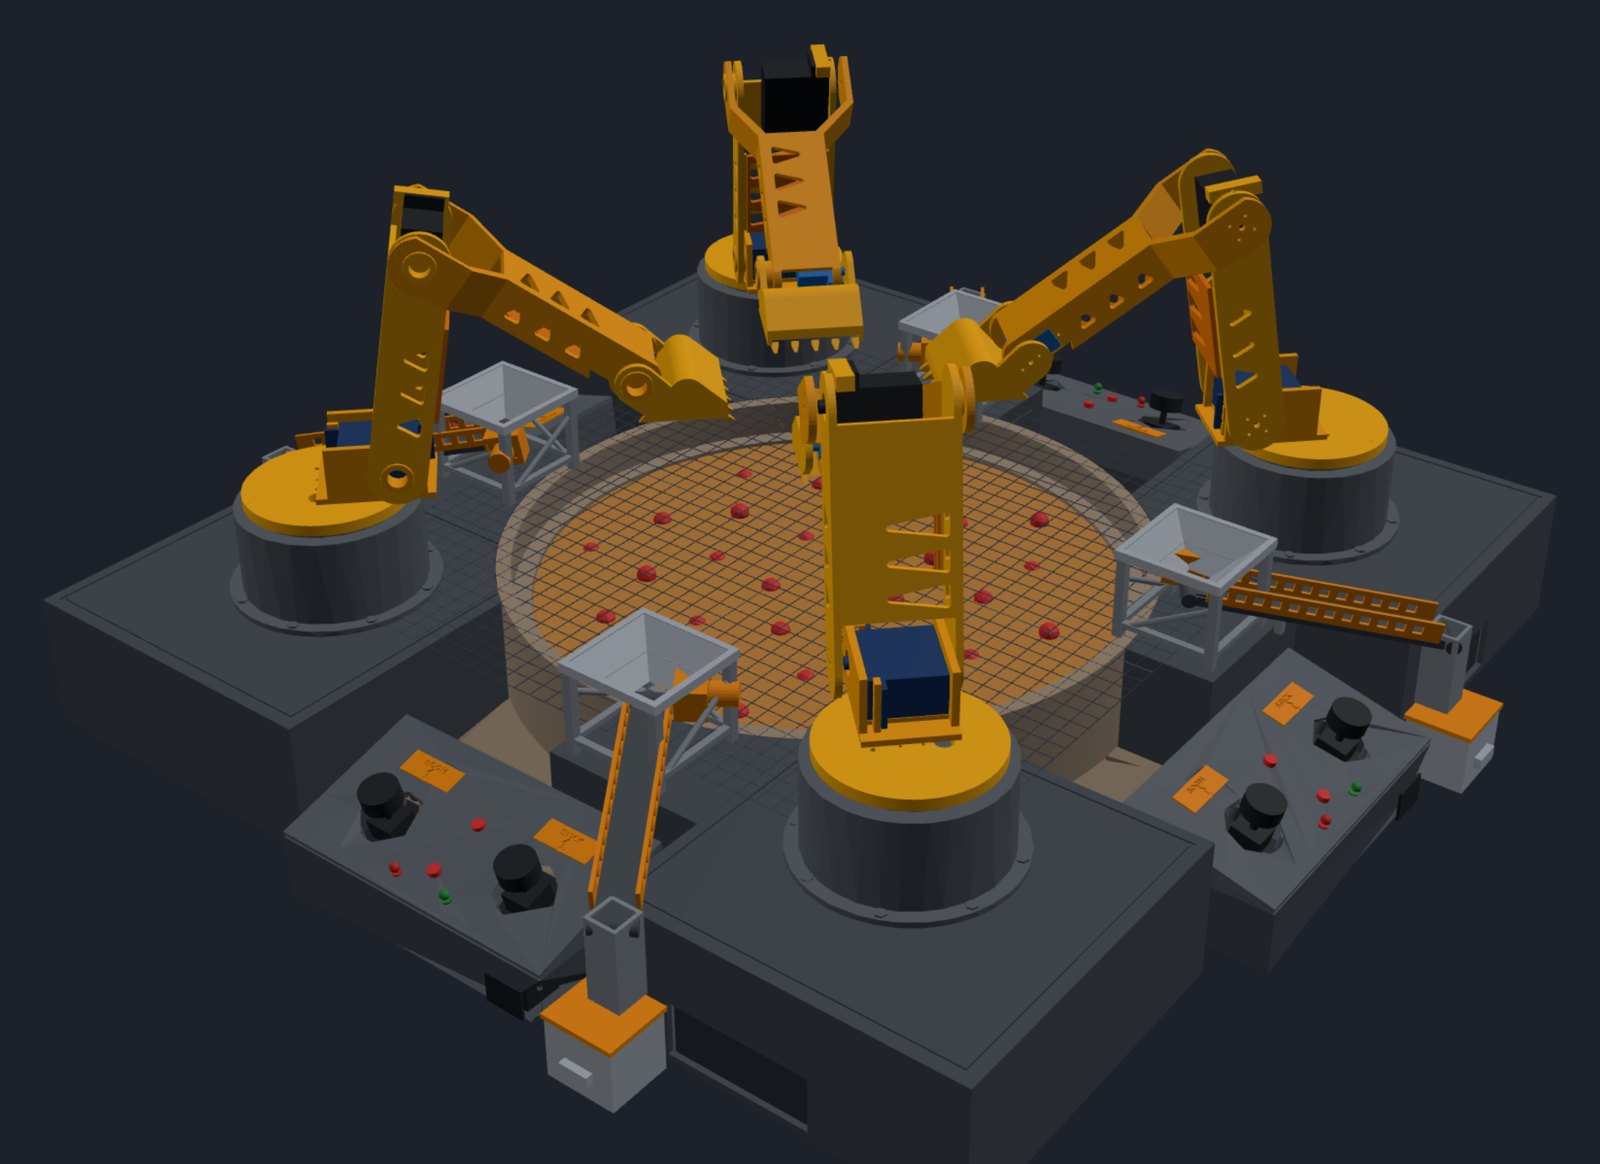
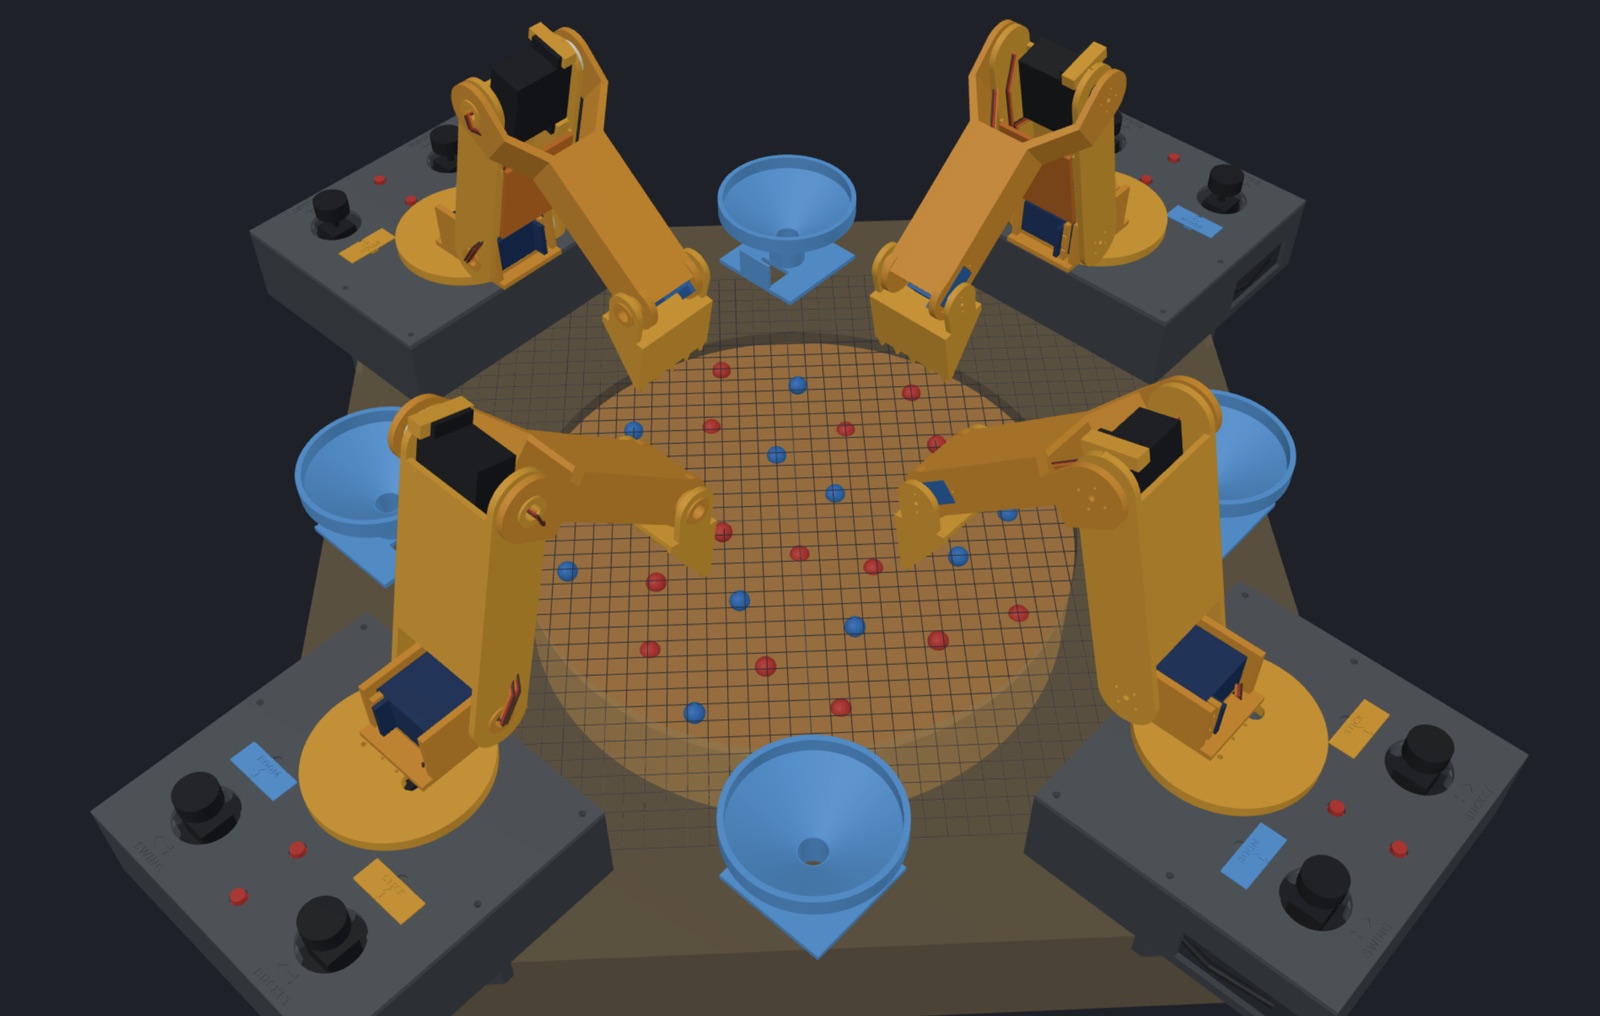
Here's the whole game. Press View in 3D: it turns slowly on its own, you can drag it round, and Explode pulls the crews apart:
The tiles
All four tiles are the same print, turned 90° each. That only works if one seam edge of a tile mates with the other seam edge of its neighbour. So one edge has three dovetail fingers and the other has the matching notches. They drop in from above like jigsaw pieces: they can't pull apart sideways, and to take the board down you lift a tile out.
The fingers cost me 10 mm of board. A 250 mm tile plus 8 mm fingers is 258 mm, too big for the bed, so each tile is 245 mm and the board is 490 mm, not 500.
Each tile is 14 mm thick but hollow: a 2.4 mm top skin over 40 mm ribs, open underneath. That's about 235 g instead of 1.1 kg solid.
The rim, laid like bricks
The crater wall isn't part of the tiles. It's four quarter-ring segments, each turned 45° so it sits across a seam, like a brick laid over a joint. Each segment has two 10 mm terraces and a short haul ramp, and no seam runs down the terraces. The segment ends are cut on a slope (a scarf joint), so they hide each other and print without support.
A segment holds the two tiles under it together through a ring groove in the deck. My first version had a tongue moulded under each segment to drop into the groove. Then the print check showed the segment would stand on that 4 mm tongue with its whole base in mid-air. So the tongue became its own part: a thin orange arc printed flat, a spline, glued once into a groove under the segment. It's the only glue in the board.
Sockets that let go
The modules dock with the same dovetail shape as the tile fingers, dropped in from above. I wanted them easy to lift out, so the fit does the work: 0.15 mm of clearance a face, and a small printed bump on a flexing wall that clicks into a dimple in the socket.
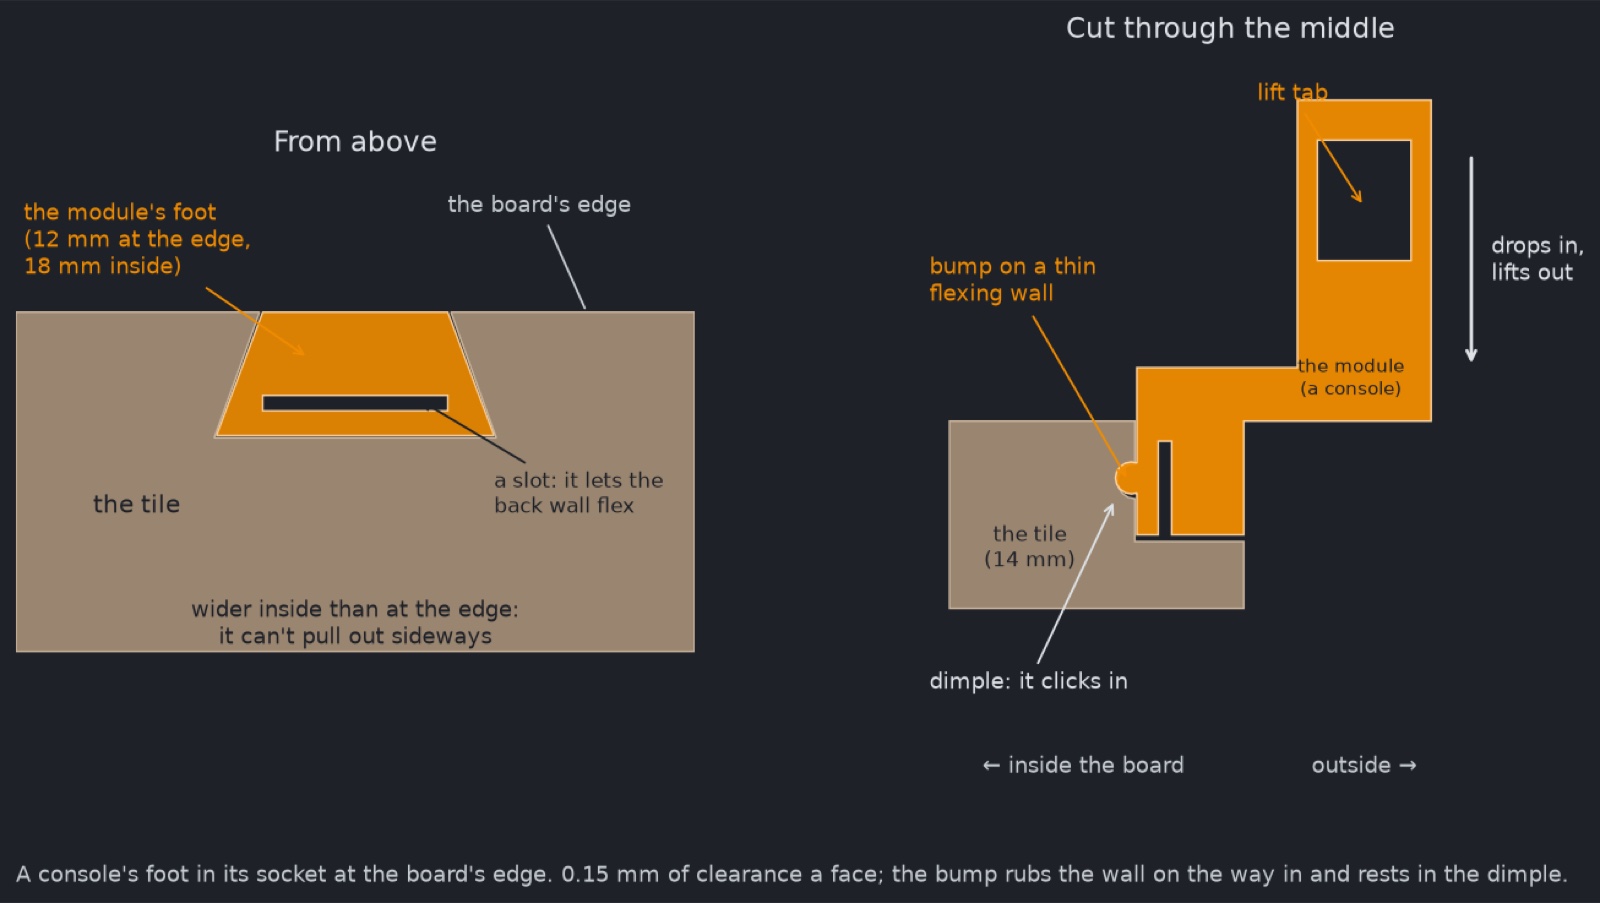
When I looked at the model, I found only one socket on a tile, and it looked like a thin chevron. Two bugs: four sockets were turned 180°, pointing out of the tile into thin air, and the fifth sat over the tile's hollow underside with no walls. The model now checks every pocket: fully cut, solid walls round it, and a test plug sitting in it.
Test the fit before 65 hours of printing
The whole board is about 1.5 kg and 65 hours on the P1S. Before any of that, there's a seam test piece (about 60 g): two tile corners where a seam meets the edge, a short piece of rim with its spline, and a plug with the detent and a lift tab.
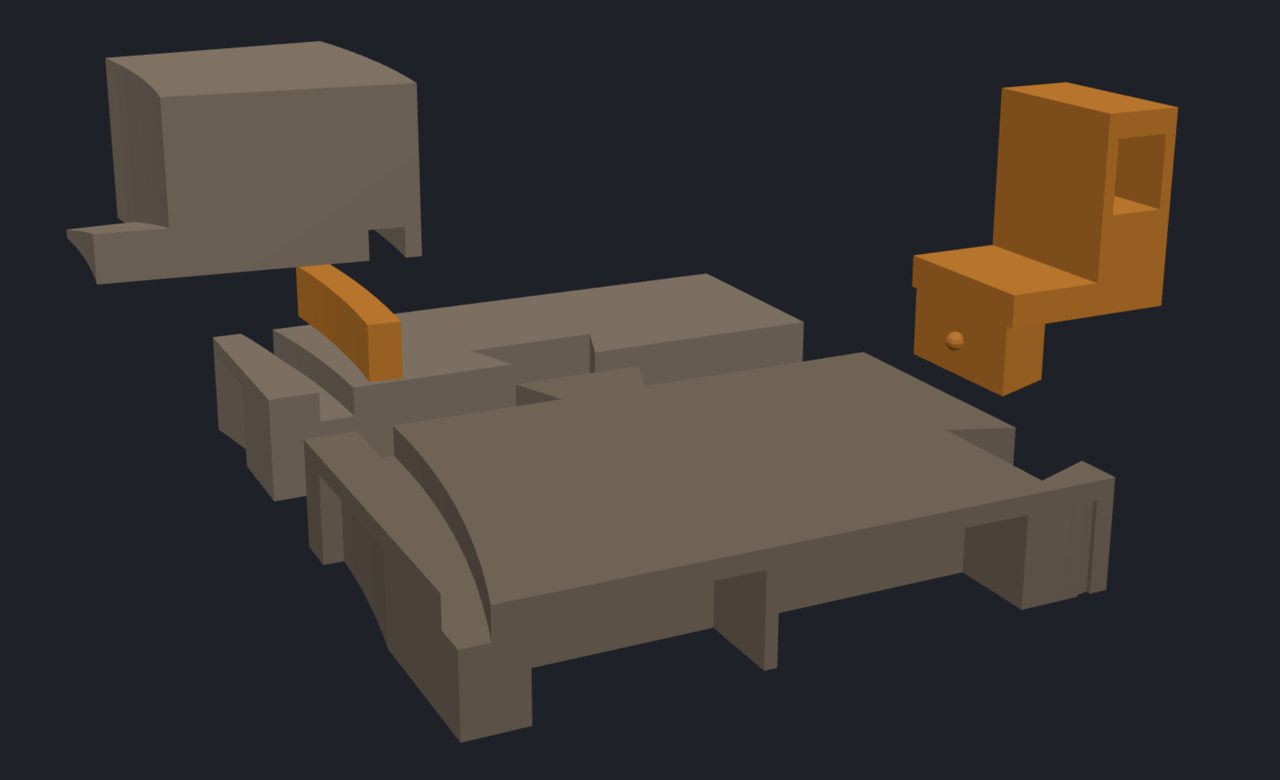
If a fit is too tight or too loose, one number changes and only the test is reprinted.
What I learned
- Design the whole before fixing the parts. I was testing collisions on a layout I hadn't really designed. One question at a time got me a board I like in an evening.
- Identical parts need two different edges. For four copies of one tile to fit together, each tile carries both halves of the joint: fingers on one seam, notches on the other.
- Check how a part stands on the bed. A small tongue under a big part leaves everything else printing in the air. Making it a separate glued spline fixed it.
- Look at the model, not just the checks. My check said the plug fit its socket. It did, because there was no socket there. Now the check looks for the pocket too.
- Print the joint before the board. A 60 g test settles the fits for 1.5 kg of tiles.
Comments (0)